
My First Pull Request: Allyourpasswords


The first contribution to an open-source project can be a truly daunting prospect whether you have years of experience or mere months. Putting yourself into such vulnerable situations which invite evaluation requires a great deal of bravery. With more spare time available since graduating, I've been increasing the number of fun little projects I've been working on to keep my skills sharp or gain new ones, but I was yet to contribute to an open-source project authored by someone else. So, having found one which really intrigued me, I started down a path ripe to teach me a variety of soft and hard skills and made my first open-source pull request.
Update
Here is something I was reminded of during code review which I forgot during all the excitement and anxiety - don't forget to follow a similar strategy with pull requests as with commits. They should be clear, single-purpose, and light-weight. This limits the scope of change and keeps them focused such that the history is clear and changes can be independently reversed. Not to mention, doing so makes them clearer in purpose to reviewers!_
Catch up on the series: Part 1: How I configured the environment and project.
Contributing
First, allow me to detail my mindset before starting: determined, excited, but somewhat reminiscent of JD in "My first day". On the JD scale, you could say I was around this point:

This past week, I've been delving into the world of macOS Cocoa applications with Swift and sprinklings of Objective-C by examining and tinkering with a great project, allyourpasswords. If you read my last post, you'll know about this application but for those who may not, it's an offline password manager for macOS developed and journaled over the course of a month by Sean Walker which I stumbled upon on DEV.to. I felt this project would be a great introduction to open source contributing and its etiquette as it had a low number of maintainers, was reasonably new and was in an ecosystem I wanted to learn for future projects.
Having configured the environment, it was onto the next challenge - what can I contribute? It's a position I'm sure most developers can relate to when starting on an existing project, open-source or not, and I was certainly familiar with it. Despite having very little experience with Swift and even less so with Cocoa and Objective-C, I got stuck in and began exploring the codebase by inspecting files, parsing their intent, inspecting data retention techniques, and throwing breakpoints everywhere to see what objects look like and how it's all tied together!
Getting stuck in
It wasn't long before I ran into a problem. As I ran the application for the first time, I was prompted to set a master password. As instructed, I set a dummy password, and then couldn't log in without the application raising the below uncaught exception.
Fatal error: ‘try!’ expression unexpectedly raised an error: unrecognized token: “:” (code: 1): file ../allyourpasswords/allyourpasswords/ContainerViewController.swift, line 30
The offending line was reported as 30 of ContainerViewController.swift which is the top line of the below:
let rowCount = try! db?.scalar(login.table.count)
firstRow =  try! db?.pluck(login.table.limit(0).order(login.name, login.url))

if (rowCount ?? 0 > 0) {
     row = firstRow
     showDetailViewController()
} else {
     showEmptyViewController()
}
Despite being a non-Swift native speaker (I'm getting there!), one can recognise various concepts at play and can understand the intent of this segment of a function - we're reaching out to the database through a recognisably-named member object, db, to retrieve a count of the records in the login table. Based on that value, it'll either execute a function to load a detailing view or continue to show an empty view pane.
The interesting "Swift-y" bits of this are the usages of ? and ! used for "unwrapping". Wrapping is a neat construct which literally wraps your types and values in one of two special values representing some(t) or none. In the case where T exists, it'll unwrap this value (somewhat similar in concept to C/C++ pointers where you must dereference a pointer to access its value, else you get its memory address). So what's the unwrapping syntax?
?- This is an "optional" variable. When we unwrap using this character, we're essentially asking to access that member or function of the object, if the object exists within it. Think Schrödinger's cat, it's either valid and usable orniland we might not know which, so this is a way to protect againstnilreferences without failing at runtime. From my (admittedly limited) experience thus far, you'll often see this used in conjunction withguard.??- Nil-coalescing operator: this one's a neat shorthand for saying if a value exists, use it, otherwise, treat it asnil.!- This forces the unwrap whether the contained type/value exists or not. If so, great. If not, hello runtime exception. In terms of declarations though, this character means the reference is implicitly unwrapped - in other words, usable without having to unwrap first. So why take the risk? Performance, of course.
Now knowing this, I found a way to get the application to load. I did this by expecting the db reference to throw, as shown below, where the try? indicates potential failure and guard immediately performs the defined checks as if an assertion to exit the statement should it fail. Otherwise, it'll continue to unwrap the optional variable and grab our data from the database. This is a protective layer around typical Swift optional binding (e.g. if let x = true { y = false }). Here's a much better explanation of guards. In retrospect, this was not solving the issue as it was avoiding it by immediately return-ing from the function due to the exception being raised and handled. I accepted that it would enable login for the time being and decided to return to the problem later, as user access to their data could be considered more important than the 'UI sugar' of displaying the first item by default.
guard let rowCount = try? db?.scalar(login.table.count) else {
    return
}
Now, having logged in, I added a few dummy logins and found another bug - rut-roh! This time, I noticed that when authenticating with the application successfully, the default pre-selected item from the list of stored logins was un-selectable. That's to say, by selecting the 0th item first, the detail view was unable to load. However, by selecting another item before selecting the top item, the detail view would successfully load each one.
Having run under the debugger a few times and watched the flow of events when clicking an item, I traced the problem to the retrieval of the user-selected item's index which is used to both highlight the item and load the relevant login record into the detail pane.
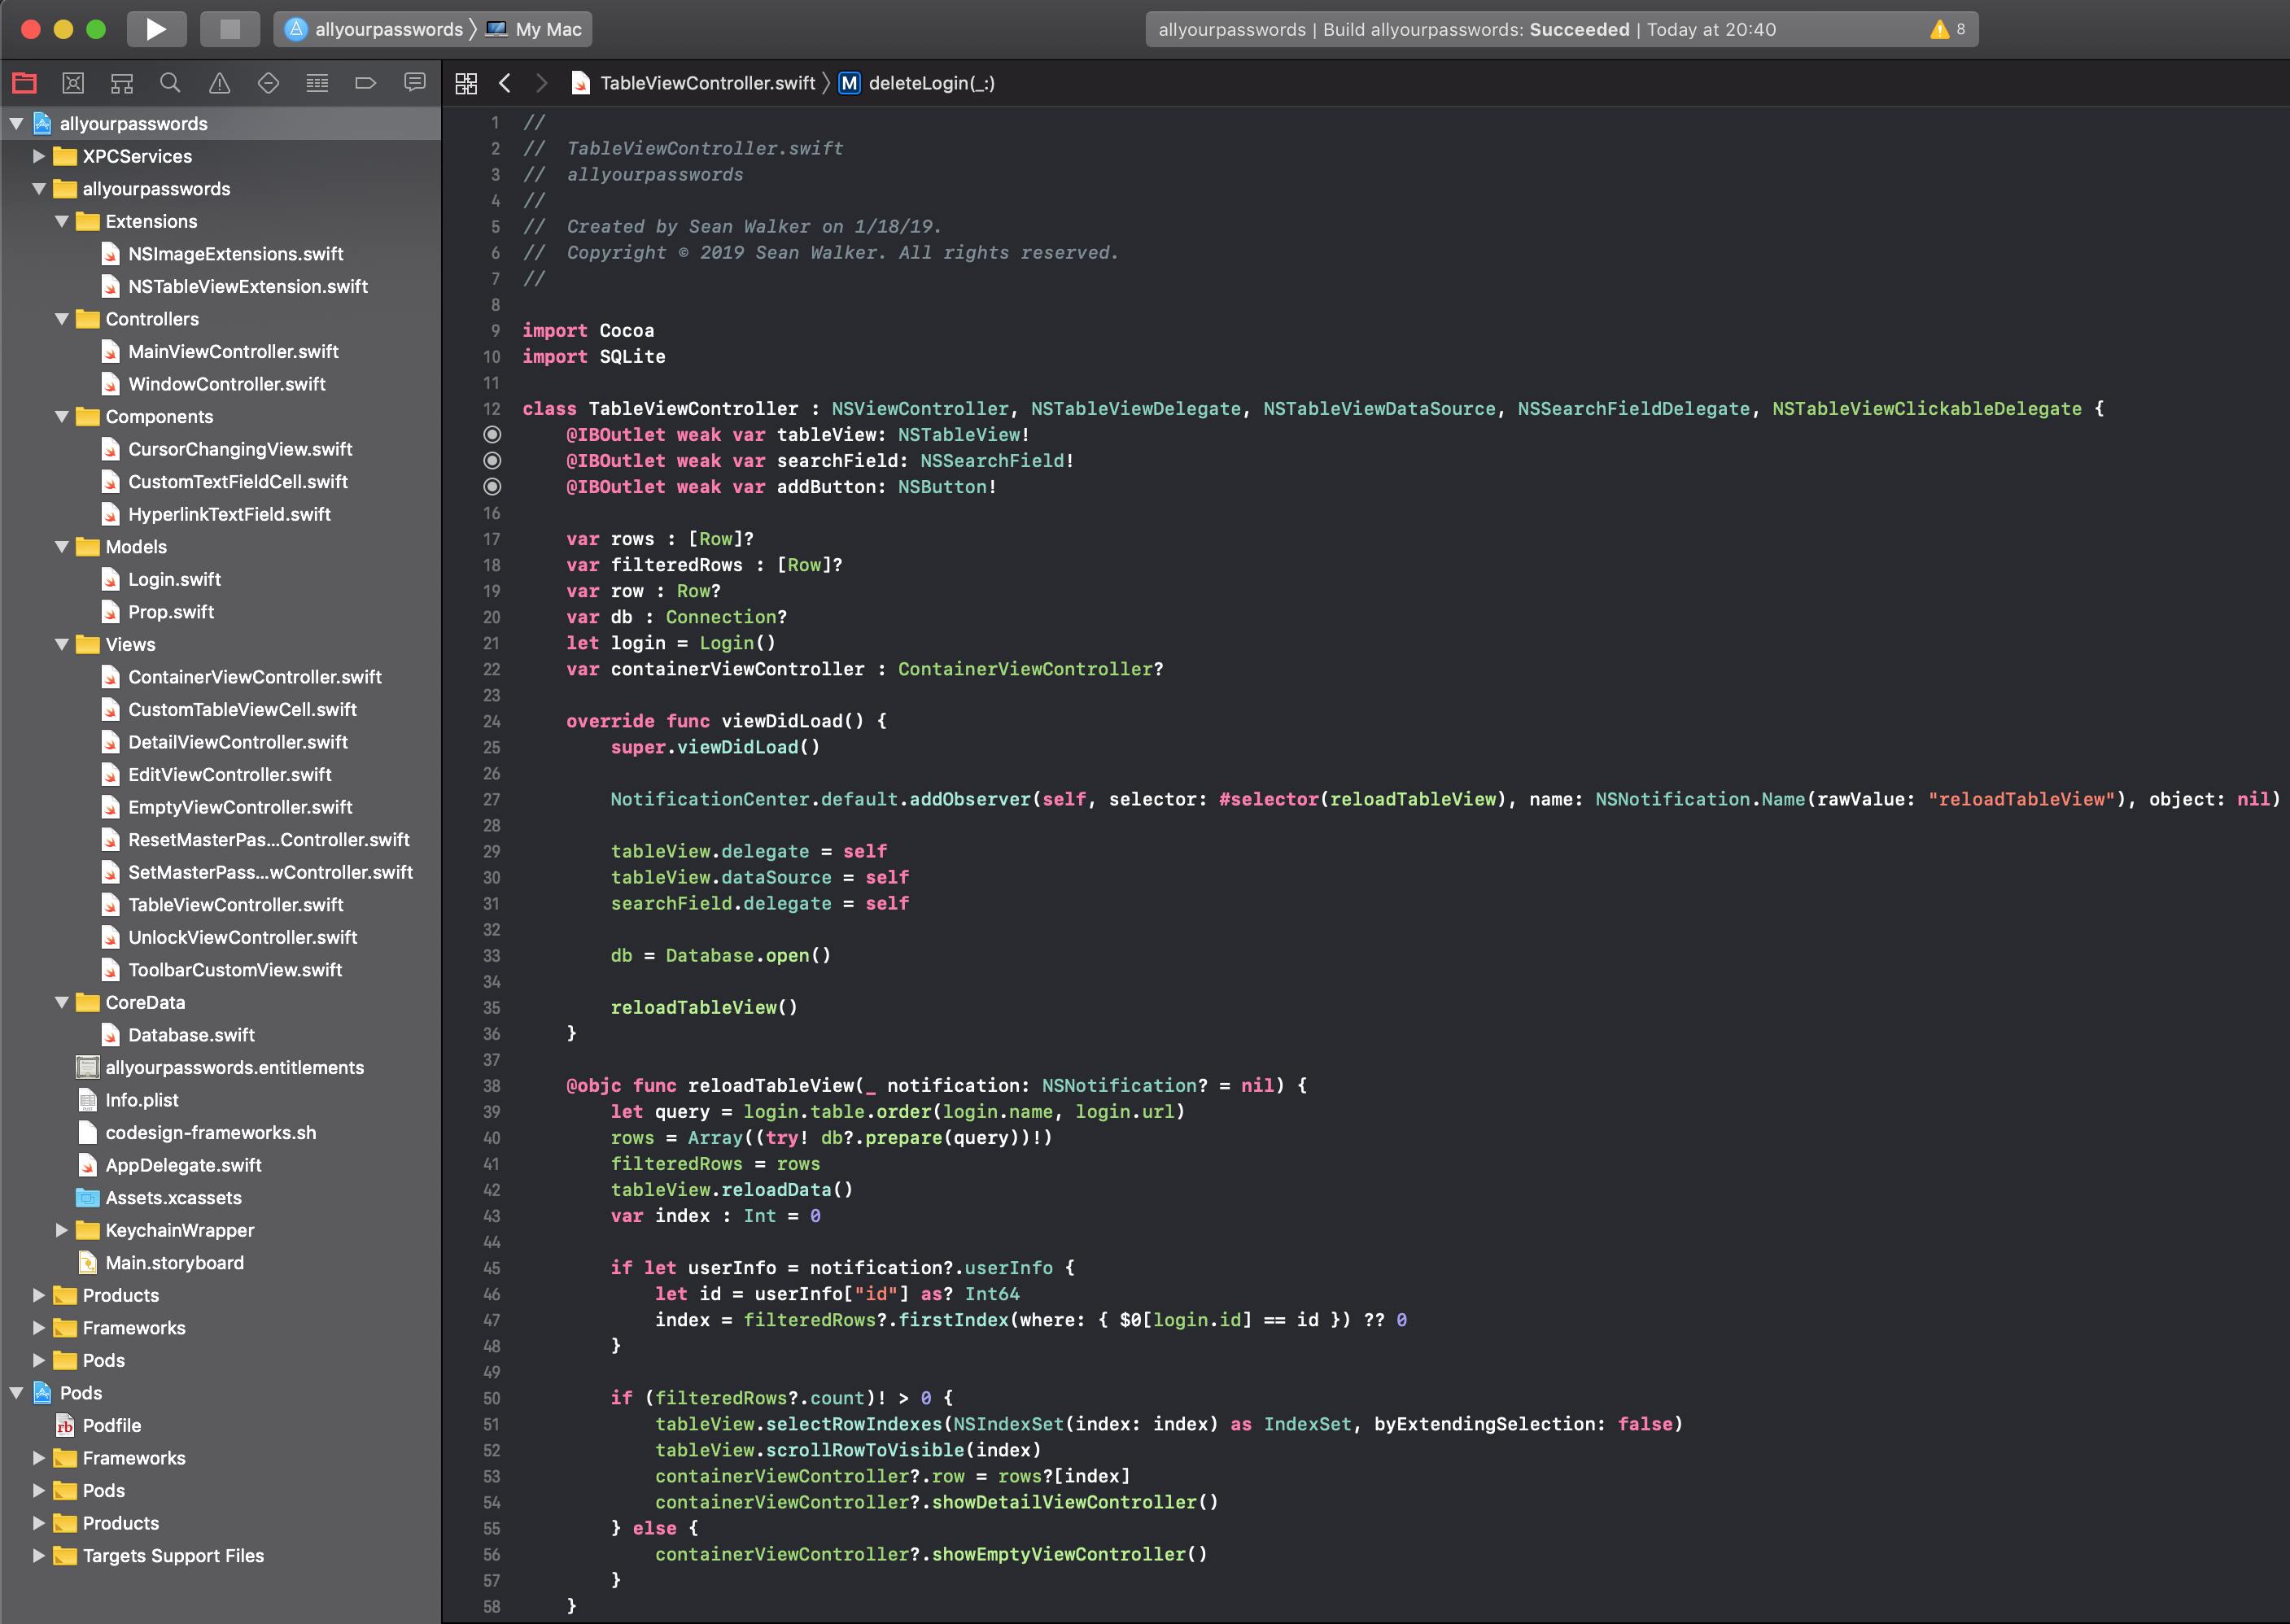
It seemed that by using the following lines in the reloadTableView() (below) function of ContainerViewController, when the window was first rendered, the top item in the left-hand login pane is assigned as the tableView.selectedRow as the default index used for setting the selected login item was 0. This applied the default, darker highlighting on the item in the left-hand sidebarTableView.
@objc func reloadTableView(_ notification: NSNotification? = nil) {
    let query = login.table.order(login.name, login.url)
    rows = Array((try! db?.prepare(query))!)
    filteredRows = rows
    tableView.reloadData()
    var index : Int = 0

    if let userInfo = notification?.userInfo {
      let id = userInfo["id"] as? Int64
      index = filteredRows?.firstIndex(where: { $0[login.id] == id }) ?? 0
    }

    if (filteredRows?.count)! > 0 {
      tableView.selectRowIndexes(NSIndexSet(index: index) as IndexSet, byExtendingSelection: false)
      tableView.scrollRowToVisible(index)
      containerViewController?.row = rows?[index]
      containerViewController?.showDetailViewController()
    } else {
      containerViewController?.showEmptyViewController()
    }
  }
  func tableViewSelectionDidChange(_ notification: Notification) {
    let rowIndex = tableView.selectedRow

    if rowIndex > -1, rowIndex < filteredRows?.count ?? 0 {
      self.row = filteredRows?[rowIndex]
      containerViewController?.row = self.row
      containerViewController?.showDetailViewController()
    }
  }
However, when clicking any item displayed in the left-hand login list, the function NSTableView::tableViewSelectionDidChange() is triggered as tableView.selectedRow changes value, as documented in the developer docs. However, if we select the 0th login item (topmost), this event is not triggered as tableView.selectedRow is already set to 0 and so the currently selected item does not change and so is blocked from being displayed.
To resolve this issue, one could simply remove the lines below from reloadTableView() to prevent the default var index : Int = 0 from being assigned, further preventing the pre-selected item. However, since it seemed the pre-selection highlighting was by design as to indicate to the user that these items are selectable, I hunted around for a solution.
tableView.selectRowIndexes(NSIndexSet(index: index) as IndexSet, byExtendingSelection: false)
tableView.scrollRowToVisible(index)
Eventually, I stumbled upon this suggestion. Quite simply, it was the Swift adaption of the Objective-C flavoured solution I knew I required - to override the mouseDown(NSEvent) event function to ensure the selection is set correctly on every click. This is done by defining an extension to the base class of the NSTableView class used to create the left-hand sidebar. Simply put, we then define a delegate called NSTableViewClickableDelegate which triggers a new action called didClickRow from within the overriden mouseDown(NSEvent) function.
import Cocoa

extension NSTableView {
    open override func mouseDown(with event: NSEvent) {
        super.mouseDown(with: event)

        let globalLocation = event.locationInWindow
        let localLocation = self.convert(globalLocation, to: nil)
        let selectedRow = self.row(at: localLocation)

        if (selectedRow != -1) {
            (self.delegate as? NSTableViewClickableDelegate)?.tableView(self, didClickRow: selectedRow)
        }
    }
}

protocol NSTableViewClickableDelegate: NSTableViewDelegate {
    func tableView(_ tableView: NSTableView, didClickRow selectedRow: Int)
}
This delegate function will then be implemented in the TableViewController to declare its behaviour when receiving this custom didClickRow event. In this case, we want to give the user a visual update with regards to the currently selected item in the form of highlighting and auto-scrolling in the list view. As you can see, it'll then load the right-hand detail view containing the data of the selected item assuming there are more than 0 records in the login table as stored in TableViewController->filteredRows.
@nonobjc func tableView(_ tableView: NSTableView, didClickRow selectedRow: Int) {
    tableView.selectRowIndexes(NSIndexSet(index: selectedRow) as IndexSet, byExtendingSelection: false)
    tableView.scrollRowToVisible(selectedRow)

    if selectedRow > -1, selectedRow < filteredRows?.count ?? 0 {
      self.row = filteredRows?[selectedRow]
      containerViewController?.row = self.row
      containerViewController?.showDetailViewController()
    }
  }
All that remained was to address an earlier spotted opportunity to improve the developability of the application by refactoring the project structure into groups for a more coherent and navigatable experience. In the end, I ended up organising the previously unstructured files into the common Model-View-Controller groups with a hint of Swift-specific groups for concepts such as Extensions, as I didn't identify a clear architectural pattern such as Model-View-ViewModel, Model-View-Controller-Store__, or feature-centric structures often considered best-practice for Swift projects.
Returning to the most elusive bug, I got stuck in with a little more research by working under the assumption that as I could manually execute the desired SQL query to retrieve the count, the likelihood was that the issue was being raised from SQLite.swift. My thought process was that as it had been nearly 2 months since the last commit (3 since a commit in the area producing this error), that the project referenced a specific SQLite.swift commit in it's Podfile from which the project had moved forward, and that in mid-April a new Xcode version was released (10.2) all whilst the code remained mostly similar which suggested the issue lied within SQLite.swift or within its interaction with Xcode.
Fatal error: ‘try!’ expression unexpectedly raised an error: unrecognized token: “:”
After some further surfing, it turned out to have been an issue in SQLite.swift itself, as I suspected. I found the following SQLite.swift issues on GitHub reporting this issue a few days ago.
- "App crash in Xcode 10.2 & error: unrecognized token: ':'" - 894
- "Invalid SQL statements with Xcode 10.2" - 888
The issue was the following, as described by the reporter, tanzolone:
In Xcode 10.2 beta 4 the macro#functionshows a different behaviour. As SQLite.swift relies on #function in different subroutines for the composition of SQLite queries, several bugs linked to invalid SQLite statements seem to be introduced.
I have just run the SQLite.swift tests with Xcode 10.2 beta 4 and there are several failures linked to this issue.
An example as follows. In the following helper function (
Helpers.swift line 107):
func wrap(_ expression: Expressible, function: String = #function) -> Expression {return function.wrap(expression)}when called from
static func count(_ star: Star) -> Expressionthe value of the function when running in Xcode 10.2 beta 4 is
count(_:)instead ofcount. This leads to invalid SQLite statements of the typeSELECT count(_:)(*) myTable.
The project maintainers have now resolved this issue at the latest HEAD of master (currently 1a908a7da11852f252e7c6b6366a4d9f8a7d5272. In my fork, the line which required updating was the following in the Podfile:
pod 'SQLite.swift/SQLCipher', :git => 'https://github.com/stephencelis/SQLite.swift.git', :commit => 'ed8f603f856e9f1f4adb76b63b7234547257ec5a'
This was updated to:
pod 'SQLite.swift/SQLCipher', :git => 'https://github.com/stephencelis/SQLite.swift.git', :branch => 'master'
Alternatively, one can reference the commit itself:
pod 'SQLite.swift/SQLCipher', :git => 'https://github.com/stephencelis/SQLite.swift.git', :commit => '1a908a7da11852f252e7c6b6366a4d9f8a7d5272'
To update this reference, I took the following CLI steps in my project root to remove, update, and install the projects pods:
$ pod cache clean --all
$ rm -rf Pods/
$ rm Podfile.lock
$ open -a Xcode Podfile # Updated the SQLite.swift project ref to the above
$ pod install
This then resolved the issue and the exception is no longer thrown. Nice! I've cloned, examined, changed, and contributed to an open-source project by fixing some bugs and improving the projects organisational structure. Now for the most important part - the write up.
I've come to see that just like building software in any other environment, open-source is as much about communication as it is writing code and shipping. So being able to document problems, solutions, and approaches to communicate with contributors and maintainers is crucial. The approach I took with this project was to document as I went along in this form of this very post which re-oriented my perspective and structured my thoughts which ultimately helped debug, research, and solve the problems. If you're not one for blogging, simply grabbing pen and paper and structuring the problem, facts, expectations, possible solutions, and the things you try can help just as much. All of that was translated into git issues and pull request descriptions as these are the best way to remotely communicate such things, so structuring these well is key.
As you'll see from one of the issues submitted on the repository, I followed a simple but informative structure:
- Description: What kind of issue am I reporting - bug, feature, enhancement? What does it consist of - what's its purpose, contents, suggestions, or problems?
- Information: What information is important to know about my environment? The operating system, IDE version, framework or language versions, etc. This can be really helpful in diagnosing problems which stem from dependent packages or to reproduce the problem. What version, or commit, is the bug present in and in which instance of the application you're using - the shipped version, or the cloned and self-built versions?
- Expected results: Whether reporting a bug or suggesting a feature, it's good to outline how you expect that thing to work. This can help others understand whether your expectations match the purpose and intentions of the software/feature to ensure it's not a PEBCAK scenario.
- Actual Results: This is mostly applicable to bug reporting or enhancements, but just as it's important to document what it should do, it's important to document what it does (or does not) do. If possible, it's a great idea to demonstrate the problem or a mock-up of a feature with images, gifs, or videos. If one knows what the problem is, one can relate instances or moments within those representations of the issue or suggestion to the offending (or suggested) code to really help others locate or visualise the issue/suggestion.
- Analysis: It's handy to give some technical descriptions regarding the bug or suggestion. One could detail how it might look in the code, in terms of IO, or from a UI perspective. In my case, I dove into tracing the problem to locate the offending classes and functions and stepping through the code at runtime to form a diagnosis.
As for the pull request, this is fairly brief. The important parts I've always felt need including are to:
- A brief introduction to or summary of the issue(s) it references.
- Again, information about the
- Link to the issue(s) to provide context for the work.
- Summarise the work done with specific reference to the issue(s).
- Some visual format of confirmation for the feature, enhancement, or bugfix in action. Again, screenshots, gifs, and videos of the application usage, code, and passing tests are great for this.
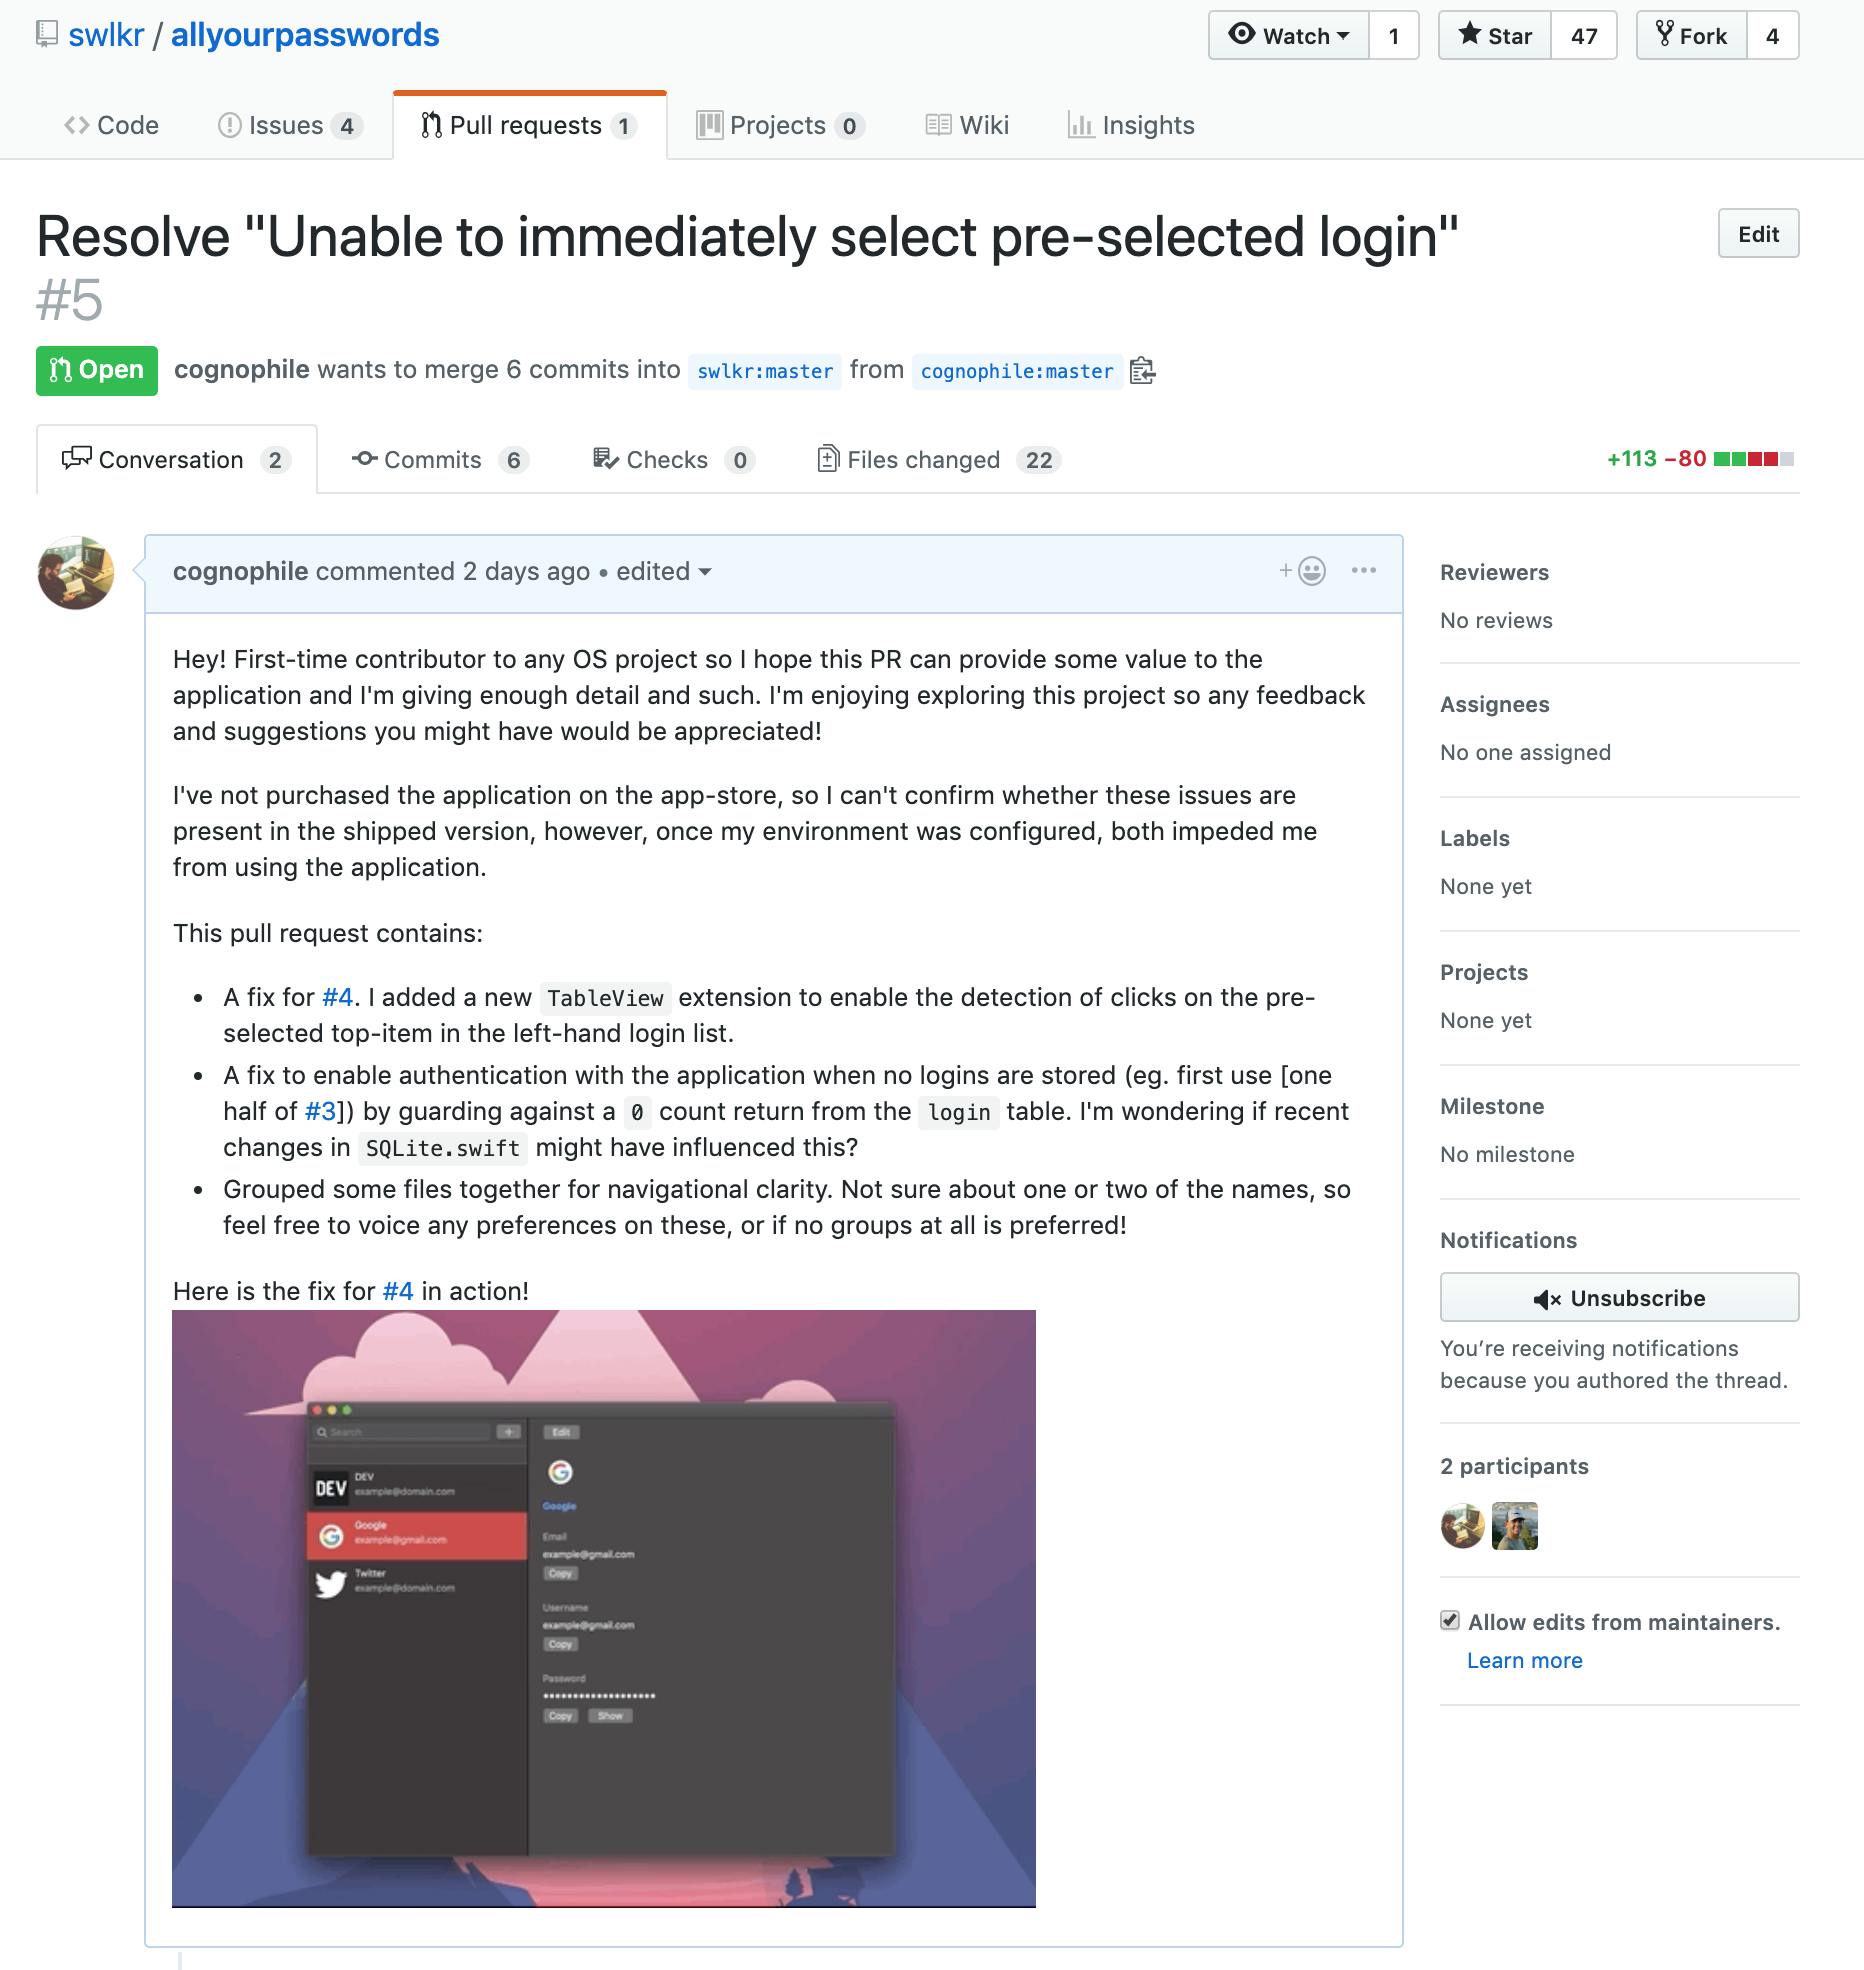
Whilst awaiting a response from the maintainer, it's a great opportunity to perform a little self code review. There's no end of resources online and in print for various strategies and best practices for this, but here are a few:
- BrightDevs "Self code review" on dev.to
- Palantir "Code review best practices" on Medium
- Trisha Gee "Code review best practices" on FogBugz
So, having achieved this milestone, which JD would I class myself as now, I hear you ask? Well, externally:

Meanwhile, internally:

What's to learn from this?
What I set out to show with this post is that contributing to open source is no different from any other form of software development. It requires the same structured problem solving, attention to detail, and focus on documentation. It's just more public and involves others. I empathise with those to whom that's a daunting thought - I've been there. Everyone has been there. But think of it like this - the contributors and maintainers who you likely think will look down upon you for having less experience than them made that code open source for a reason; for help. It doesn't matter that you aren't an expert. What matters is that you have the desire to participate and help in some form, that you take it seriously, have good (at least written) communication and a solid approach to problem-solving and/or some great ideas to improve their work.
Plenty of beginner-friendly projects exist (search and you will find them in abundance - which is awesome!) and with those kinds of projects, the worst that can happen is you get some helpful insight and feedback to make you a stronger developer or engineer in the long run. Putting your work on the public stage is intimidating, but giving it a shot will pay dividends in the long run! After all, every day's a school day!